


How to Cover a Fence with Artificial Hedge Screening

How to Cover a Fence with Artificial Hedge Screening
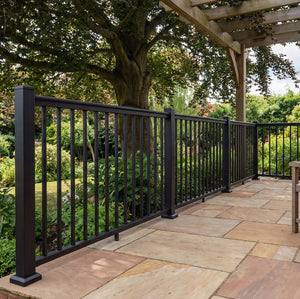
A tired, weathered or boring fence is the easiest thing in the garden to transform. Artificial hedge screening turns a bare boundary into a dense, evergreen wall in an afternoon — no growing, no painting, no maintenance. Here's exactly how to do it.
✓ Covers any fence
✓ Fitted in an afternoon
✓ Full, solid coverage
✓ Zero maintenance
Why cover a fence with artificial hedge screening?
Fences are practical but rarely attractive — they weather, fade, warp and date. Artificial hedge screening fixes the look instantly while adding privacy, and it's far less effort than the alternatives: no painting every few years, no waiting for a climber to grow in, no living hedge to trim.
Instant transformation
A bare or tired fence becomes a lush green wall in a single afternoon — no growth time, no drying time.
Hides anything
Weathered timber, concrete posts, chain-link, ugly panels — the foliage covers it all completely.
Adds privacy
Dense panels block sightlines and add a little height and screening on top of the existing fence line.
No upkeep
No repainting, no trimming, no feeding. UV-stable foliage stays green through every UK season.
Panels vs roll screening: which covers a fence better?
Most "artificial fence screening" sold online comes on a roll — and many of those products openly admit you can still see through them to some extent. That's fine for a light decorative touch, but for genuinely covering a fence and gaining privacy, solid interlocking panels do a far better job.
| Hedge panels (tiles) | Roll screening | |
|---|---|---|
| Coverage | Dense, solid, no see-through | Often thin — can see through |
| Realism | Multi-depth, layered foliage | Flatter, more uniform |
| Fitting | Clips together, fixes flat to fence | Cable-tied, can sag over time |
| Neat edges & corners | Trim cleanly to size | Frays / loose edges |
| Longevity | 3–5 years, holds shape | Varies; thinner mesh backing |
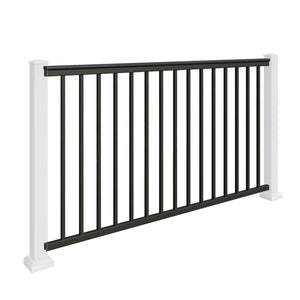
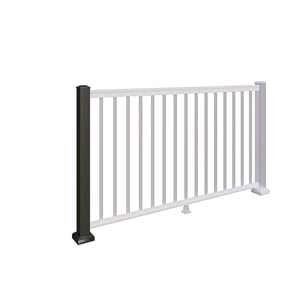
Our hedge panels are 50cm × 50cm and 1m × 1m interlocking tiles in UV-stabilised PE (polyethylene), made to give full, solid coverage rather than the partial screen you get from a thin roll. See the full range.

A tired timber fence transformed with dense artificial hedge panels.
What you'll need
- Artificial hedge panels — enough to cover your fence area (see sizing below).
- Cable ties (for wire/mesh fences and railings) or a staple gun / U-nails (for timber).
- Strong scissors or secateurs for trimming panels to size.
- Tape measure, and a helper for longer runs.
- For brick or rendered walls: timber battens, galvanised mesh and screws to build a fixing frame.
How many panels do you need?
Measure the width and height of the fence you want to cover, in metres, and multiply for the square-metre area. Then:
- 50cm × 50cm tiles: 4 tiles cover 1m².
- 1m × 1m panels: 1 panel covers 1m².
- Add 5–10% for trimming and overlap.
Worked example
A fence 5m wide and 1.8m high = 9m². That's about 36 of the 50cm tiles, or 9 of the 1m panels, plus a little extra for trimming. Our coverage guide has more examples.
How to fit hedge screening to a fence: step by step
Check the fence is sound
The fence carries the weight of the panels, so make sure posts and panels are stable and well-fixed first. Repair or re-secure anything loose before you start — it's far easier now than later.
Clip the panels together
Connect the panels to each other using the male and female connectors on the mesh backing. Build up runs on the ground first where you can, so you're fixing larger sections rather than individual tiles.
Fix to the fence
On a timber fence, staple or U-nail through the mesh backing into the timber. On wire mesh, chain-link or railings, cable-tie the panels straight on. Work from one end, keeping the top edge level — run a string line if you want it perfectly straight.
Stagger the joints
Offset the vertical joins between rows like brickwork rather than lining them up. This hides the seams and gives the most natural, gap-free finish.
Trim to fit
At posts, corners and the top edge, trim the panels to size with strong scissors or secateurs. Cut from the back through the mesh; the foliage springs back to hide the cut line.
Finish the edges
Tuck and fluff the foliage along the top and side edges so no mesh backing shows. Stand back, check for any thin spots or visible joins, and add offcuts to fill if needed.

Covering a brick or rendered wall instead?
You can't staple or cable-tie directly to masonry, so build a simple fixing frame: screw timber battens to the wall, attach a layer of galvanised mesh across them, then cable-tie the panels to the mesh. This spares you drilling dozens of holes and gives a strong, even surface to fix to. The panels themselves attach exactly as they do on a fence.
Best panels for fence coverage


Browse these and more in our hedge panel range, in 50cm and 1m sizes.
Ready to transform your fence?
Tell us your fence dimensions and we'll work out exactly how many panels you need and send a tailored quote.
Frequently Asked Questions
Can I attach artificial hedge panels to any fence?
Yes — timber, wire mesh, chain-link and railings all work. Timber takes staples or U-nails; mesh and railings take cable ties. For brick or rendered walls, fix a batten-and-mesh frame first, then attach the panels to that.
Will the panels damage my fence?
No. They're lightweight and fix with cable ties or small staples. On a sound fence there's no issue; just make sure the fence itself is stable before adding panels, as it carries their weight.
Can you see through hedge screening?
Not with dense panels. Unlike many thin roll screens — which often admit you can see through them — our interlocking panels give solid, full coverage with no gaps when fitted correctly.
How long does it take to cover a fence?
A typical garden fence run takes an afternoon. Clipping panels together into larger sections first, then fixing them, is quicker than fitting tiles one at a time.
Will it last outdoors?
Yes. The panels are UV-stable, weatherproof and frost-proof, made from UV-stabilised PE that holds its colour year-round, with a typical life of 3–5 years.
Best Sellers
- £95.29
- £95.29
- Unit price
- per
- £151.12
- £151.12
- Unit price
- per
- from £0.99
- from £0.99
- Unit price
- per
- £63.42
- £63.42
- Unit price
- per
- £10.99
- £10.99
- Unit price
- per
- £11.15
- £11.15
- Unit price
- per
- £231.88
- £231.88
- Unit price
- per
- £11.15
- £11.15
- Unit price
- per
- £7.91
- £7.91
- Unit price
- per
- £39.99
- £39.99
- Unit price
- per
- £5.99
- £5.99
- Unit price
- per
- £7.06
- £7.06
- Unit price
- per
- £10.99
- £10.99
- Unit price
- per
- £22.99
- £22.99
- Unit price
- per
- £21.74
- £21.74
- Unit price
- per
- £10.99
- £10.99
- Unit price
- per
- £74.99
- £74.99
- Unit price
- per
- £1.41
- £1.41
- Unit price
- per
- £21.74
- £21.74
- Unit price
- per
- £122.15
- £122.15
- Unit price
- per
- Choosing a selection results in a full page refresh.